Easy and Affordable Ways to Give Your Boring Kitchen Cabinets a Face-Lift
Kitchen cabinet refacing is a whole lot cheaper than buying new — and so much more creative.
Oh, cabinets. They’re just one part of your kitchen, but they have a huge impact. No matter how chic your new appliances or furniture may be, worn or outdated cabinets can ensure your kitchen looks … dumpy. But before you scramble to the showroom, have you checked out the cost of brand new cabinetry these days? (At least several thousand dollars for low-end — and the price of a car for custom!) Who has the time for such a big project anyway?
If your answer is “definitely not me,” there’s good news: You don’t have to live with less-than-lovely cupboards. Here are four quick-and-easy ideas to create a completely new look for very little cash.
If your answer is “definitely not me,” there’s good news: You don’t have to live with less-than-lovely cupboards. Here are four quick-and-easy ideas to create a completely new look for very little cash.
1. Try a Two-Tone Design
The solid maple cabinets in Canadian homeware designer Nicole Duff’s kitchen weren’t in bad shape. She just hated their “dated, orangey tone that screamed late 90s.”
The solid maple cabinets in Canadian homeware designer Nicole Duff’s kitchen weren’t in bad shape. She just hated their “dated, orangey tone that screamed late 90s.”
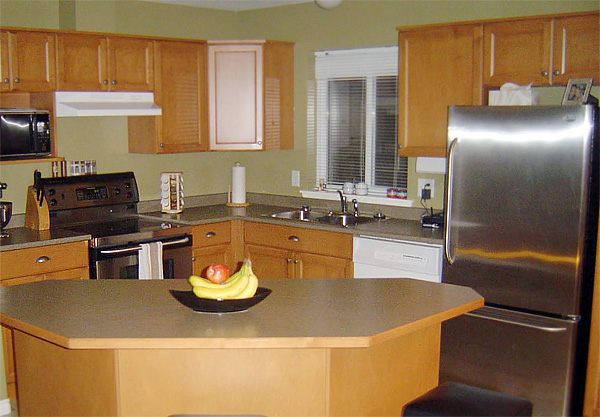 Image: Nicole Duff
Duff and her husband decided to paint the upper cabinets white and the lower cabinets a charcoal gray, which, she says, “is very on-trend right now.”
They began by thoroughly cleaning the wood with TSP cleaner (a heavy-duty product designed for pre-painted surfaces). Next came a high-adhesion primer, followed by the paint. The entire process took about a week to ensure sufficient drying between coats. Once dry, Duff applied clear silicone cabinet stoppers on the back of each door to prevent them from sticking and tearing off the paint.
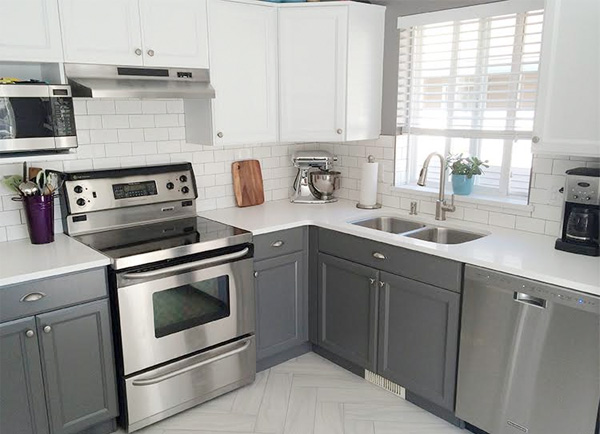 Image: Nicole Duff
“All in all, we ended up spending about $300 on everything,” she says. And when the gray and white cabinets are no longer trendy? “We can just paint them again!”
Related: Paint Ideas for Kitchen Cabinets
2. Add Some Glass
At age 25, Virginia-based kitchen and bath designer Ebony Stephenson was “working on a very strict budget” when she updated the kitchen in her very first home. The existing builder-grade oak cabinets were hardly the sleek, modern style she craved. So she came up with a dramatic solution that was both easy and inexpensive.
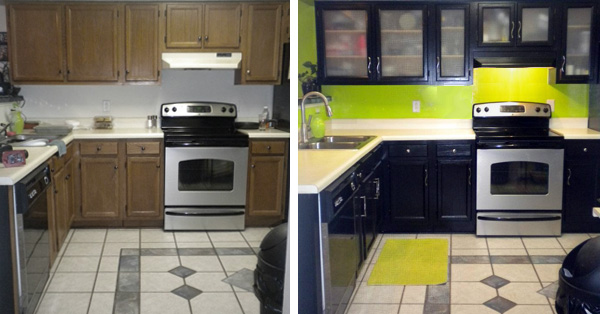 Image: Designs by Ebony
Stephenson removed all of the upper cabinet doors and brought them to a carpenter, who cut out the center panel in each door (a handy DIYer can do this at home). She replaced the wood with translucent glass panels ordered from a local auto glass company. (You can also check out shower door and mirror suppliers.)
After sanding and priming the doors, she painted them a true black to match her black appliances. Finally, she inserted the glass herself, swapped out the hardware, and re-hung her sleek new cabinets.
Stephenson estimates she spent between $50 and $100 for all eight doors, and approximately $300 for the glass. New, brushed nickel hardware from her local home store was $20. The results? Stephenson thinks they’re priceless.
3. Give Wallpaper a New Purpose
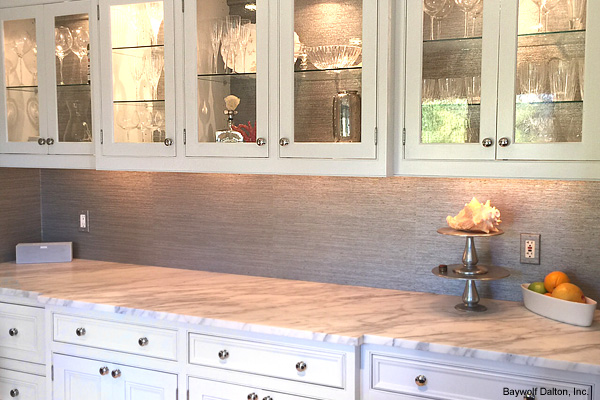
Does the view inside your glass-front cabinetry lack pizzazz? Nancy Dalton, partner in the Seattle design/build firm Baywolf Dalton, uses wallpaper on both the interior backs of cabinets and the backsplash below to jazz things up.
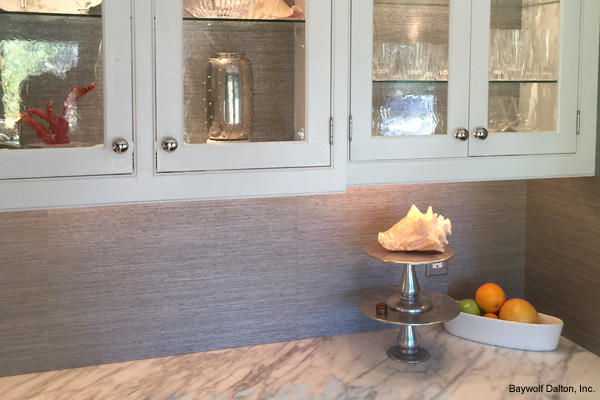 Image: Baywolf Dalton, Inc.
“The wall reads right up and through, and the items you’re displaying have more punch.” Dalton says the technique is especially “wow” when you have white cabinets.
The project is an easy one for anyone who feels confident about wallpaper installation or is willing to learn. The good news is the Internet is bursting with wallpaper tutorials. The hardest part? Picking out the design!
4. It’s Not About the Base (Coat)
Not everyone has the patience for multiple, painstaking steps. If you want great cabinets in record time, consider a can of chalk paint. This thick paint doesn’t need primer, glides on easily, and dries to a warm, aged finish. It’s a perfect project for new DIYers — or anyone without much time on their hands.
Human resources professional Karen Torchia transformed the “weird, dark brown-stained cabinets” in her Boynton Beach, Fla., kitchen in about 15 hours using white chalk paint followed by a shiny, white gloss coat. The whole project cost around $200.
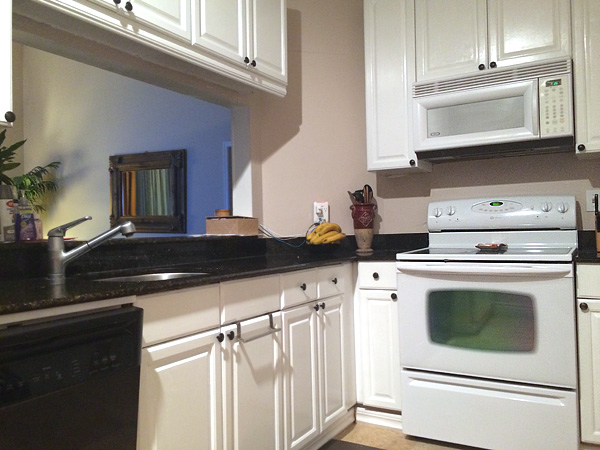 Image: Karen Torchia
“I’m really amazed at how much brighter the kitchen looks now,” she says. “It lights up that whole side of the house.”
Who knew transforming the look of your entire kitchen could be as easy as a quick coat of paint or some wallpaper? With your cabinets looking great, all of the other great features in your fabulous kitchen will shine even brighter — and with so much time on your hands, you might even start thinking about livening up those countertops, too.
Related: Pros, Cons, and Costs of Refacing Kitchen Cabinets
Read more: http://www.houselogic.com/home-advice/kitchens/kitchen-cabinet-refacing/#ixzz3yYyNfZzx
Follow us: @HouseLogic on Twitter | HouseLogic on Facebook




![Existing Home Sales Slow Amongst Tight Inventory [INFOGRAPHIC]](http://www.simplifyingthemarket.com/wp-content/uploads/2015/09/EHS-SEP-STM-150x150.jpg)


